
Open Logic Sniffer Case
So this story beings quite recently, when, being the ‘noob’ that I am, I reversed the polarity while setting up the Linksprite UART camera ready for another post. Sadly, I had my bench supply set to unlimited current. Well, long story short, the camera is dead. Sad times, because beyond the first post I made about it, I haven’t even had a change to use it yet.
Well, having destroyed my latest toy, I thought I’d buy a new one to make up for it. No, really, I needed the tools to try and repair the camera, and well, I needed a Logic Analyser.
Honestly, this post is more about the case than the Logic Analyser, because I found something new to play with. For those interested, the logic analyser is this one. I may do a separate post on it at some point, cause it’s pretty cool, but right now, I’m interested in the case.
Why the case? Well, being the fan of OSS/OSH (that’s; Open Source Hardware 🙂 that I am, this was a nice, affordable entry into the market of Logic Analysers.
It’s always great having bare P.C.B.s because come on, they just look downright cool, but, this is a tool, there are likely to be a lot of wires around, and plenty of potential to short something out. Trust me, I have learned my lesson already.
I had a look around, and within 5 second of searching I managed to find a nice, elegant and slim case, just one issue, it was acrylic, and I’m not a huge fan of clear acrylic. The case in question is this one by ‘builttospec’ on Thingiverse, many thanks to them for making it available under the CC-SA license.
Searching around for ways to get this thing made real, I came across RazorLab, where you can upload your design and get an instant quote for having your item made. Sadly, the file from Thingiverse was not compatible with the RazorLab system and so some changes had to be made. RazorLab has 3 sizes of material, and templates to build from in order to fit these sizes. This being my first ever attempt, and likely to fail, I went for the smallest (and cheapest) size (P1) measuring 181mm x 181mm.
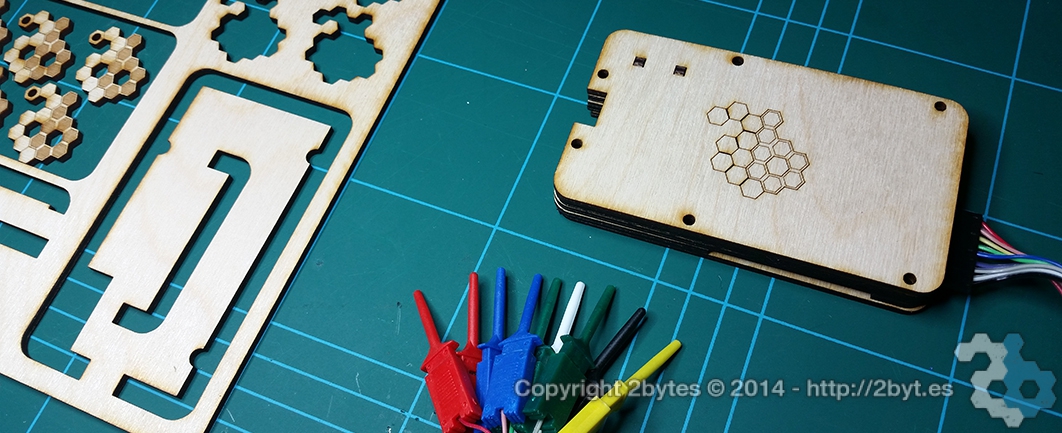
This is where the second issue hit me. The pieces for the case won’t all fit onto the smallest size board that RazorLab offers, so I had to make some adjustments. One of the pieces in particular was mostly empty space, and having just three sides meant a lot of wood in the middle was wasted. I decided to trim this into three parts, around the screws, so the case still holds together solidly, but has a small opening in each side.
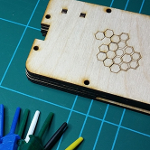
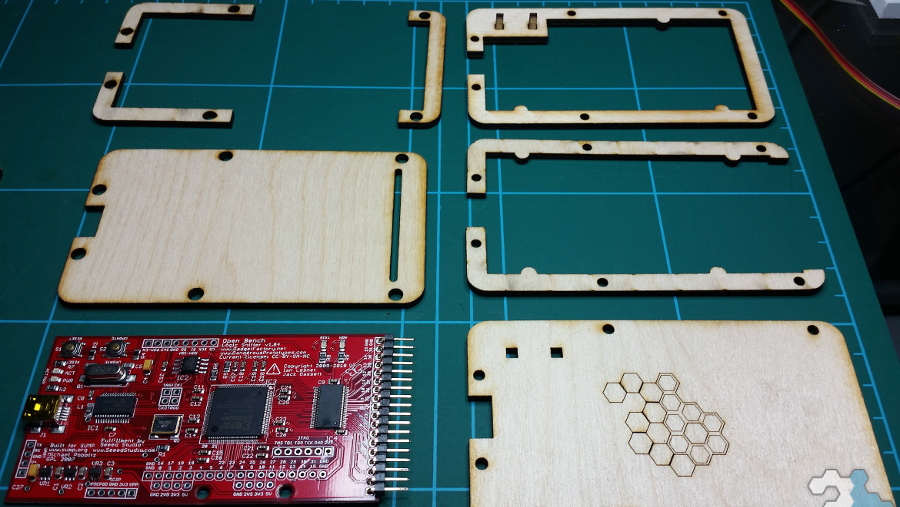
Once the case had fit properly onto the sheet, I found there was a lot of free wood, unused, which seemed wasted, so I decided I’d have a go at designing the 2bytes logo for laser cutting/engraving. I had replicated this into all the empty spots I could find (well, not quite all, but more on that later), before deciding to have a go at engraving it onto the lid of the case.
As can be seen, this isn’t quite perfect, some areas should have been “shaded” as with the keyring cut outs, but I didn’t want to risk cutting out bits accidentally.
Next I upload the file, and the RazorLab system finally accepts it, I select my material which comes out at about £1 something for material, and about £15 for “cutting”. As it turns out, you are charged for the amount of work the laser has to do, the fewer lines, the cheaper the work becomes (so I removed some of the extra key-ring cut outs). Note, that removing them all, reduces the cost to around the £5 mark for cutting this particular case (including the case logo), so I put a few of them back, taking the total to around £13 to have what you see in the pictures made.
I submitted the file, paid using PayPal and crossed my fingers I hadn’t made any serious mistakes. In the meantime I was going to need some hardware to put the thing together!
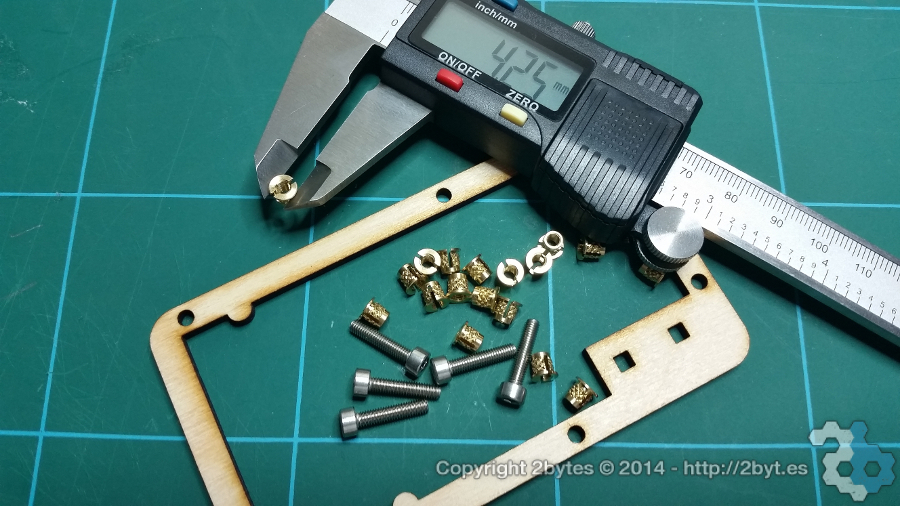
In order to put the case together, some brass inserts are required, specifically, M3 push fit for wood/acrylic, with recommended hole diameter of 4mm. Also, some bolts are required, I opted for socket cap with allen/hex heads because I like the look and prefer hex to other screw head types. When assembling my case I used only 4 out of the 5 layers, opting to leave out the one pictured above, in this case (no pun intended) the bolts have approximately a 2mm protrusion from the bottom of the case, so if you intend to do the same, buy M3x12 or M3x10 bolts.
RazorLab kept me updated step by step with my order, and having opted to collect in person (it would have cost about another £4.50 to have it delivered), I made my way to their London address once my order had been cut, a few days after ordering.
Fingers still crossed I opened it up and was pleasantly surprised that in fact there were no major issues with the design (RazorLab does a manual check of your files first so I imagine they would spot serious issues before cutting).
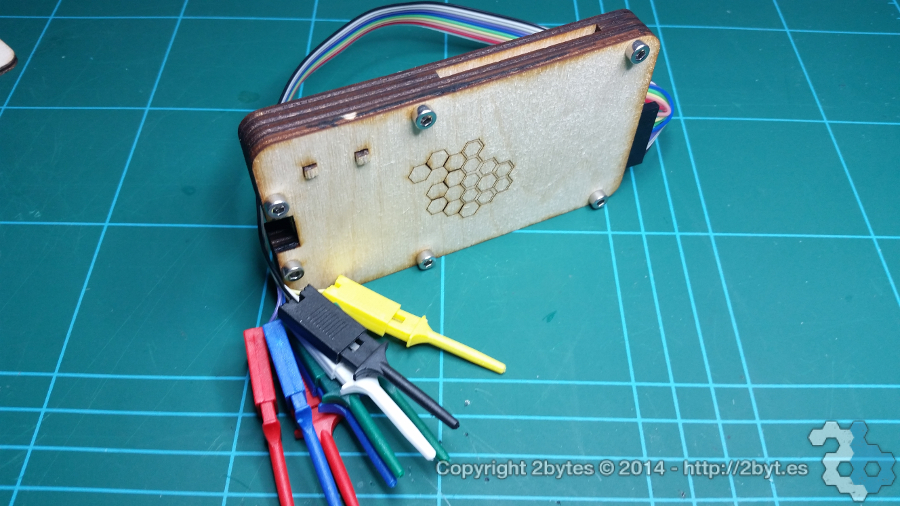
Hardware in hand I put my case together housing the logic sniffer and ended up with the beauty below. Overall I’m very pleased with my first effort at Laser cutting, not forgetting that the real work was done both by builttospec for designing the original case (linked above) and to RazorLab for doing a fantastic job of cutting the case quickly and at a great price. I look forward to having many more things cut to my gadgets!
So, in the true spirit of open, I’d like to share the modified design file in RazorLab format, shared under the same license as the original for you to cut yourself. You can of course tweak it as you wish to be cut elsewhere if RazorLab is not an option for you. Enjoy.
EPS design file: 2Bytes of OLS – RazorLab P1
Note: I have left the 2bytes keyring parts/case logo in the file, but feel free to delete them to reduce the cost of making the case, or to replace with something of your own.