
Serial Commander - Arduino UART Command Library
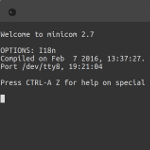
Sadly, this post won’t be as image heavy as I like to make them. On it’s own, there is little to show, but the thing that’s really exciting abut this simple library is that it allows me to update Pixel Commander to a point I consider ready to continue the project I’ve spent a long time procrastinating over.
Serial commander is intended to be an easy to use, serial command library for controlling your Arduino projects.
Sending a command to your arduino can be as simple as writing;
PCHELLO2bytes[Enter]
and having your Ardiono return;
Hello, 2bytes
Summary
Ok, so I guess you’re thinking what the heck is that command?
Well, it’s easier than it looks. Let me break it down;
PC          | HELLO           | 2bytes
----------  | --------------- | -------------
Start Word  | Command Name    | Payload
PC
is the start word (two bytes), this can be any two bytes (characters) you like, that your command must start with. This is so that the command library knows when to start reading a command you send it.
HELLO
is the name I have given to my custom command. This, again, can be anything you like, given some restrictions. Currently, Serial Commander (SC) will allow commands of up to 16 characters long. This could be anything like “ON”, “OFF”, “FLASH”. It doesn’t have to be capitals either, nor does it particularly have to be letters, it could be numbers, special characters, anything you want so long as you don’t use any of of the control characters (like Newline).
2bytes
is the “payload”. This is the data that is passed to the command in order for it to act. In this case we’re passing the name “2bytes”. This could be any piece of information that your command might need to perform its function. For example, in Pixel Commander, the command “SC” (Set Colour) takes three hex values in RGB format, this data is passed to the “SC” command function so that the Arduino can change the colour of the LEDs.
[ENTER]
is the ENTER key on your keyboard. It means, literally, press enter at this point. In order for SC to know when your command has ended, you should press enter, this effectively “ends” the line and tells SC that the command has finished. If you are automating the process of commanding your Arduino, the literal characters used are 0x0D and 0x0A (hex values). This can be changed if necessary, but I strongly recommend against it unless you know what you are doing.
Usage
Ok, now lets explain how to set this up. The idea of SC is that it should be extremely simple to get started, because, well, who wants to spend all day writing code when we could be controlling robots or other cool stuff?
Download
Release 1.0 of Serial Commander can be obtained from Github
Install
I’d hope most people looking to play with this should already know how to install an Arduino Library, but for those who don’t, in brief, you must copy the entire SerialCommander directory to the “libraries” directory, inside the directory you installed the Arduino IDE in.
I have used the “Import Library” feature of the Arduino IDE before only to have my sketch not able to find the code, so I would recommend the manual method above.
Instantiate
Instantiating the library is simple, at the top of your sketch, add the following line.
twobytes_SerialCommander cmdr = twobytes_SerialCommander(word('P','C'));
Notice the use of a word to define the command command start. In this case, “PC” for PixelCommander. This can be changed to anything you wish, so long as it is a word.
setup()
In the Arduino setup() function, you should add your custom commands;
cmdr.addCommand("SB", setBrightnessCMD);
cmdr.addCommand("SC", setColourCMD);
cmdr.addCommand("BL", setBrightnessLevelCMD);
cmdr.addCommand("ID", identifyCMD);
cmdr.addCommand("HELLO", sayHelloCMD);
cmdr.setDefaultHandler(unknownCommand);
and make sure to define your functions;
void setBrightnessCMD(char data[])
{
    // Add some code here to do something with the data.
}
loop()
In the loop function, simply add the line as follows;
cmdr.readSerialLooper();
Now sit back and watch the magic.
Known Limitations
The current version only supports serial accessed by the hardware Serial interface. There are currently no plans to implement the SoftwareSerial interface, but it should take minimal effort to add if required.